Add a Webcam to Klipper on The Sovol SV07 Plus

There are two options to adding a webcam to a 3D Printer with Klipper installed. Plug it in and hope it automatically works or install ustreamer through the Linux terminal which is what this tutorial covers.
Instructions
1) Turn on your Sovol SV07-Plus with Klipper.
2) Maker sure the printer is connected to the network
3) Get your printer IP address
The Linux Terminal Noob
If you are new to using a terminal/command prompt. The $: in the code examples should NOT be copied. It’s just referencing the current directory.
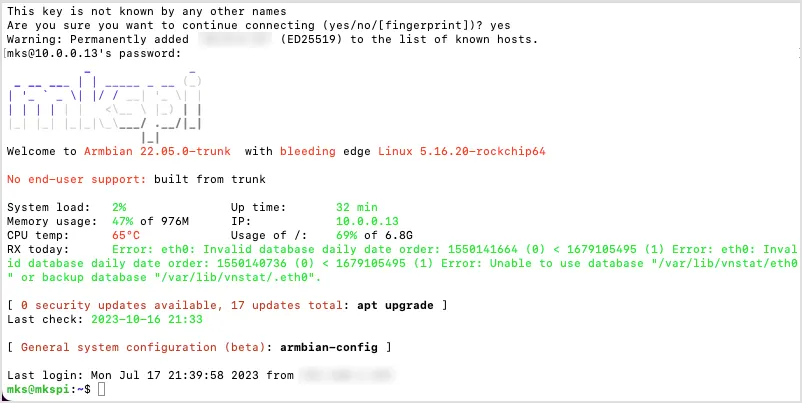
4) SSH into the Printer.
Are you sure (Terminal) prompt
- Are you sure you want to continue connecting (yes/no/[fingerprint])?
- Type: yes
5) When prompted type in your password. If you are on Windows using a GUI based tool, you’ll likely supply the password before attempting to connect.
Typing passwords in Linux
For those you who are new to the Linux terminal. You might notice that you don't see your password when typing it. This is an intentional security measure built into the Linux operating system.
You just have to know the password. Type it in, don't add any spaces, and click the Enter/return key to continue.
6) Change into the Klipper directory

7) Clone/download the ustreamer repo from GitHub.com using the following command:
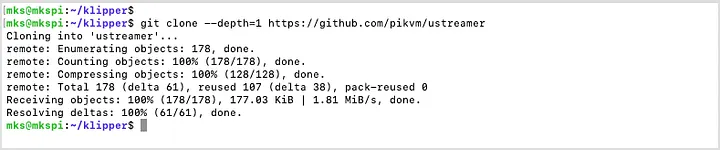
8) Change into the ustreamer directory.

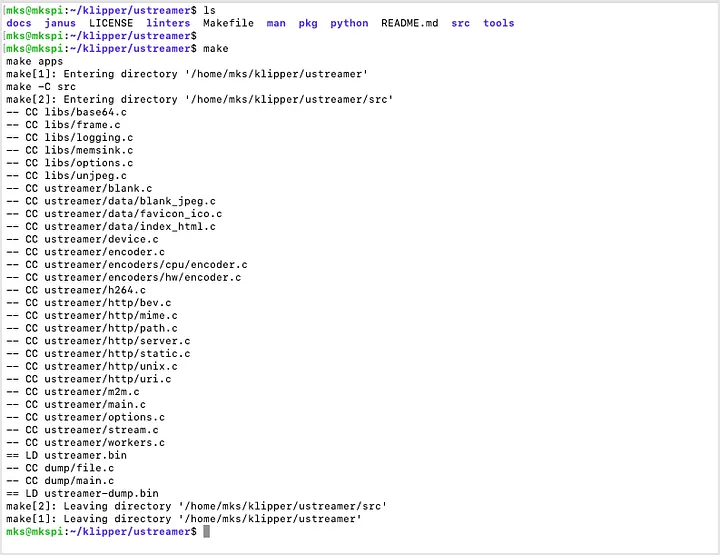
9) Type make and press enter key to execute the process.
10) Connect your USB camera. Must be type: USB-A. You can disconnect from your SSH connection. This is no longer needed.
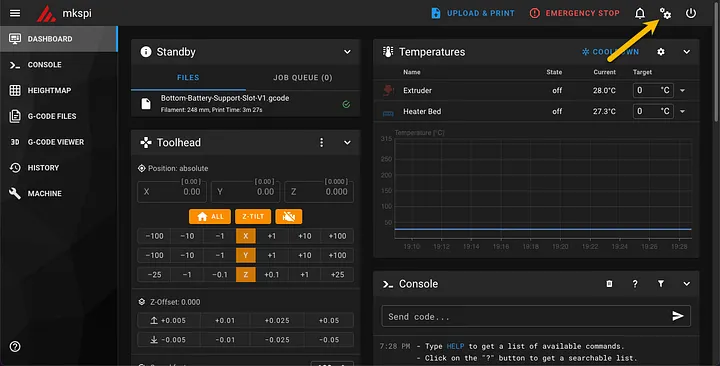
11) Open your browser and go to your printer’s IP address. In this scenario, Mainsail is loaded.
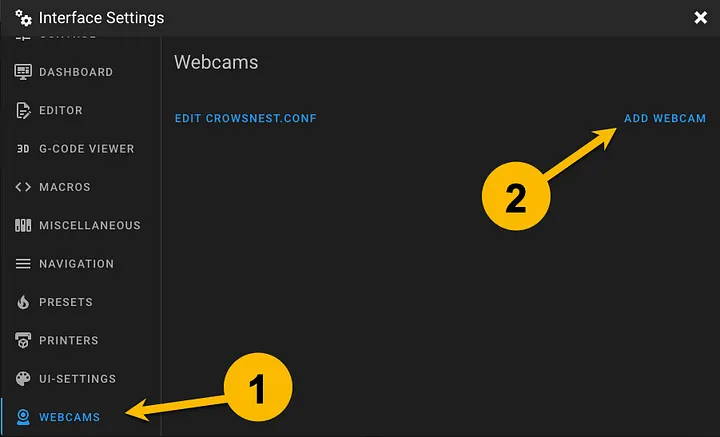
12) In the top-right of the Mainsail Web Application locate the settings gear icons.
13) In the pop-up window. Scroll-down through the left-side navigation and select WEBCAMS and then click on ADD WEBCAM
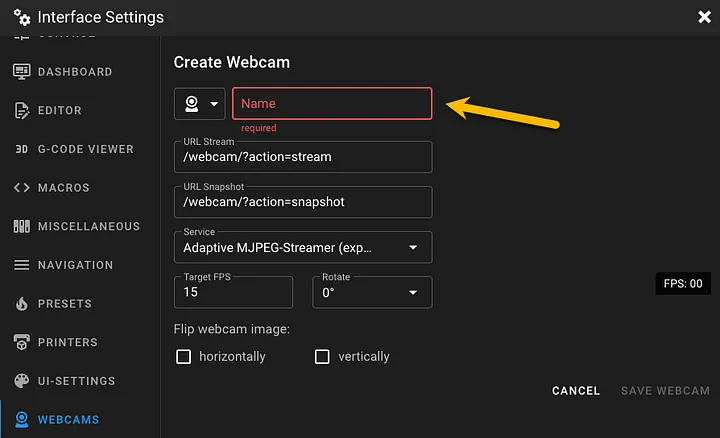
14) After clicking ADD WEBCAM, the Create Webcam window will appear. Provide a Name for the webcam.
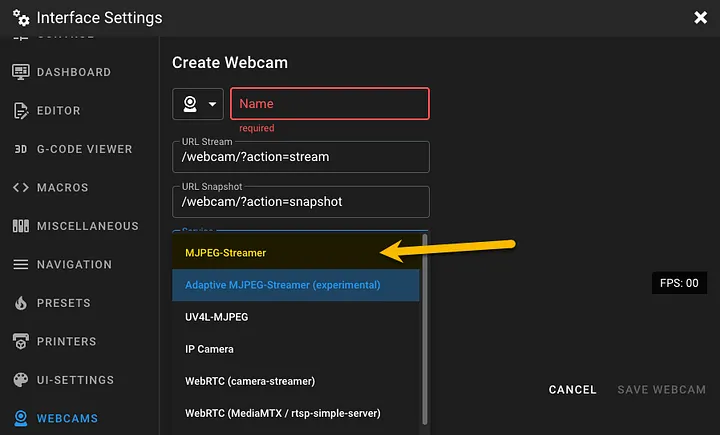
15) Now under the Service drop-down select: MJPEG-Streamer.
Do not confuse this with the (experimental) option.
16) You will see a white screen appear. Nothing will show up until restart the printer.
17) Click the SAVE WEBCAM text.

18) Close out of the Interface Settings.
19) Back in the top-right of the Mainsail web application. Click on the Power Button then under the drop-down under Host Control select: Reboot
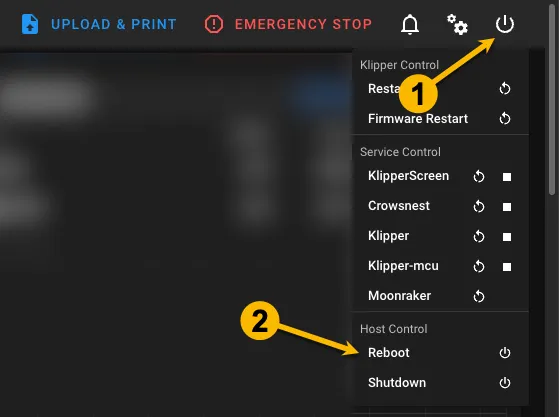
20) Once you click the Reboot your web app screen will display a Connection failed notice while it restarts.

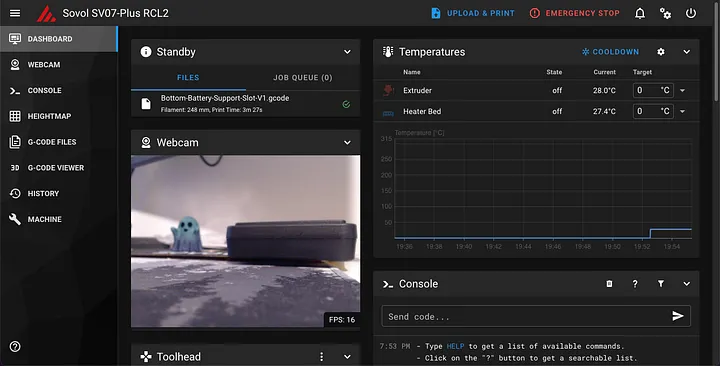
21) After the printer restarts, log back into Mainsail and you should see a live Webcam.
Yay! Your done. Have some fun!
Original Archived Article by Sovol
https://web.archive.org/web/20230812220606/https://sovol3d.com/blogs/news/how-to-use-external-camera-on-sv07